If your phone contains several thousand photos, organizing them can feel like a job you keep postponing.
There may be vacation pictures mixed with screenshots, receipts, downloaded images, family photos, memes, product photos, documents, duplicates, short videos, and dozens of abandoned albums. Some pictures may exist in more than one place, while others are difficult to find because you cannot remember when or where you saved them.
The obvious solution is to start creating more albums.
That is usually where things get worse.
A large photo library does not become easier to manage just because it has more folders. If every event, person, trip, purchase, and random group of pictures gets its own album, you can eventually end up with another mess—only this time the mess is spread across hundreds of albums.
A better approach is to reduce the number of decisions you have to make.
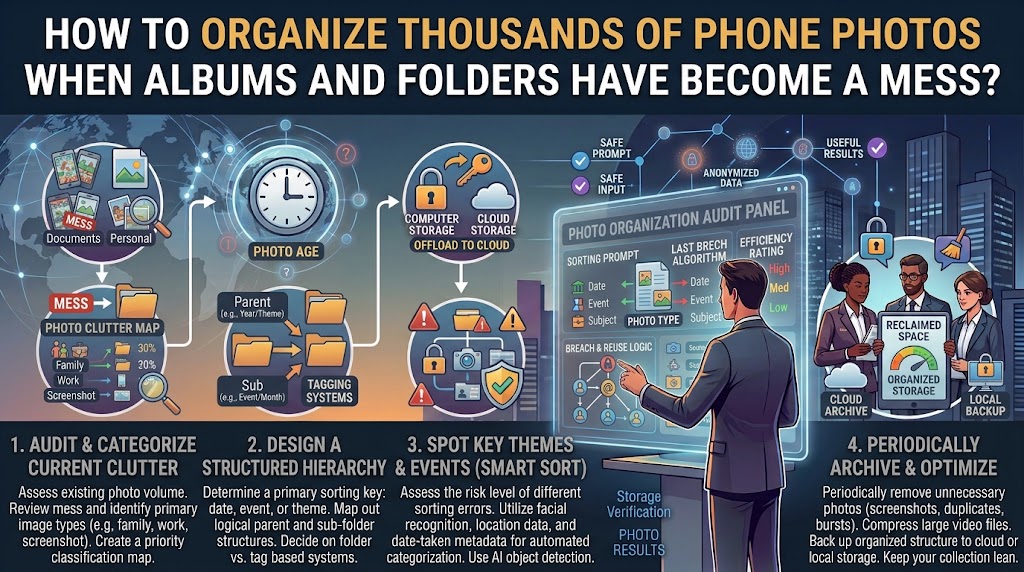
Start by protecting your library, remove obvious clutter, create a small organizational structure, and then maintain it with simple habits. You do not need to manually sort every photo into a perfect folder.
The exact tools differ between iPhone, Android, Google Photos, and other gallery apps, but the basic strategy works across most systems.
Before Organizing Anything, Protect the Original Photos
Do not begin a major cleanup by deleting hundreds of pictures.
First make sure the photos you care about exist somewhere you can recover them from.
This matters because organizing and deleting are two different jobs.
You can safely reorganize an album without necessarily deleting the underlying photos. For example, on iPhone, deleting an album does not delete the photos and videos inside it from the main photo library.
But deleting photos themselves can have much bigger consequences, particularly when cloud synchronization is involved.
If you use iCloud Photos, changes to your photo library can appear across devices using the same Apple Account.
So before starting a large cleanup, confirm:
- Your important photos are backed up.
- You know which account contains the backup.
- You can actually open the backed-up library.
- You understand whether your photo service is synchronizing deletions.
- You have enough cloud or local storage for the library.
- You know where recently deleted items can be recovered.
If you have irreplaceable family photos, travel pictures, or other important memories, consider keeping an additional independent copy before performing a large deletion.
Do not use the organization process as your first backup.
Stop Trying to Organize Everything at Once
Thousands of photos create a psychological problem before they create a technical one.
If you have 8,000 photos, you may think:
“I have to go through all 8,000.”
You don’t.
The first goal is to make the library easier to navigate. You can improve it in stages.
Instead of opening the oldest photo and working forward one image at a time, start with the biggest sources of clutter.
Screenshots.
Duplicate pictures.
Downloaded images.
Accidental photos.
Memes.
Receipts and documents you no longer need.
Long videos that consume storage.
Once those are under control, the meaningful photos become much easier to see.
Understand the Difference Between the Library and Albums
One of the biggest sources of confusion is treating an album like a physical folder.
Many modern photo systems do not work that way.
An album is often a way of grouping photos rather than a separate physical location where the original disappears from the main library.
On iPhone, for example, you can add a photo to an album while it remains part of the main photo library. You can also remove it from an album without removing it from the library.
This changes how you should organize.
You do not necessarily need to create a complicated folder hierarchy such as:
2026 → Trips → Pakistan → Lahore → Restaurants → Family → Sunday
Instead, your main library can remain the master collection, while albums provide useful shortcuts to groups you frequently want to revisit.
Google Photos works similarly in that albums provide a way to group selected photos, while the main Photos view remains the broader collection. Google currently allows very large albums, although some features may be limited with very large collections.
The practical lesson is simple:
Use albums for finding groups of photos, not as a second copy of your entire library.
Create a Small Number of Useful Categories
Before creating albums, decide what you actually want to find later.
For most people, a small structure works better than dozens of categories.
You might use categories such as:
Family
Trips
Events
Work or Projects
Important Documents
Home
Favorites
You do not need all of these.
The right structure depends on how you use your photos.
If you mostly take family pictures, travel photos, and screenshots, your system should reflect that instead of copying someone else’s organizational method.
The important part is to keep the number of top-level categories small enough that you can remember them without checking a list.
Don’t Create an Album for Every Month
Monthly albums sound organized at first.
You might create:
January 2025
February 2025
March 2025
April 2025
Then you continue for several years.
Soon you have dozens of albums containing photos that were already easy to find by date.
Your phone’s photo library can normally search or browse by date, so creating a separate album for every month often adds work without solving a real problem.
Dates are useful when the event itself matters.
For example:
Japan Trip — April 2026
is meaningful.
April 2026
usually is not.
Use albums for things you want to remember as a group, rather than information your photo app already provides naturally.
Clean the Obvious Junk Before Sorting Memories
This is where you can make thousands of photos feel manageable surprisingly quickly.
Look for photos that you already know you do not need.
Screenshots are a good starting point.
So are:
- Temporary screenshots
- Shopping images
- Old delivery confirmations
- Memes
- Downloaded pictures
- Blurry accidental photos
- Photos of documents you no longer need
- Multiple copies of the same image
- Images saved only to send to someone
- Unwanted screen recordings
Do not try to make a complicated decision about every image.
Use three basic decisions:
Keep
Delete
Review later
The third category is important.
If you are unsure about a photo, do not let it stop your progress. Put it into a temporary review group and continue.
A cleanup becomes much easier when every uncertain photo does not turn into a five-minute emotional debate.
Deal With Duplicates Separately
Duplicates are a different problem from organization.
Do not mix duplicate detection with your first pass through thousands of photos.
If your phone offers a built-in duplicate tool, use it before manually comparing every image.
On iPhone, Photos can detect duplicate photos and videos and place them in a Duplicates collection. Apple says this detection requires the library to be indexed, and the process may take some time depending on the size of the library and background activity.
Apple’s merge function keeps the highest image quality and relevant data while moving the other duplicate items to Recently Deleted.
That is useful, but do not assume every visually similar image is a duplicate.
Two pictures from the same moment might look nearly identical while containing different expressions, details, or useful information.
The goal is not to reduce your library to the smallest possible number.
The goal is to remove unnecessary copies while preserving the pictures you actually value.
Use Photo Stacks When Available
If you use Google Photos, similar pictures can be grouped into photo stacks.
Google explains that stacks can group similar photos in the Photos view so you can see a representative top pick without losing access to the other images.
This can be useful when you take ten versions of the same picture.
Instead of manually deleting nine immediately, you can first review the group and decide which ones are worth keeping.
Remember that organization features do not necessarily free storage. Google specifically notes that photo stacks themselves do not change available storage.
That distinction matters.
A cleaner view and more free storage are two different goals.
Don’t Put Everything Into Albums
This is one of the most important rules for rebuilding a messy library.
If you have 5,000 photos, you do not need to place all 5,000 into albums.
Trying to do that manually creates another maintenance problem.
Instead, create albums only when they provide a useful shortcut.
For example, a vacation album might contain 250 photos that you want to browse together.
A family album might contain important pictures from several different years.
A home-project album might contain before-and-after photos you frequently need to reference.
Everything else can remain in the main library and be found through dates, search, people, places, or other available features.
Create Albums Around Retrieval, Not Storage
Ask yourself:
“What will I want to find six months from now?”
That question is much better than:
“Where should I put this photo?”
Imagine you photograph a leaking pipe while repairing your kitchen.
You probably do not need an album called:
Home → Kitchen → Plumbing → 2026 → September
Instead, you might create a useful project album such as:
Kitchen Repair
and add the important photos.
The same principle works for:
New Car
Home Renovation
Baby’s First Year
Family Vacation
Work Project
Insurance Photos
These albums exist because you have a reason to return to them.
Use Favorites for Photos You Actually Love
A favorites system can solve another common problem.
Your library may contain thousands of technically useful photographs, but only a small percentage are pictures you would actually want to show someone.
Use Favorites for those.
Do not turn Favorites into another storage category.
It should answer one question:
“Which photos would I want to find quickly?”
That might include your favorite family photos, the best travel pictures, important memories, or a few photographs you regularly use.
If everything becomes a favorite, the feature stops being useful.
Keep Documents Separate From Memories
Receipts, screenshots, IDs, tickets, invoices, instructions, and other documents can make a personal photo library difficult to browse.
If your phone or photo service automatically recognizes documents, take advantage of that where appropriate.
Google Photos, for example, provides document categories for items such as IDs, receipts, and event information.
Google Photos also provides an archive feature that can hide selected items from the main Photos view while keeping them in albums, search results, and device folders.
That can be useful for things you need to keep but do not want mixed into your everyday memories.
However, archive is not the same as deletion.
Archived photos still count toward storage.
So use archive to reduce visual clutter, not as a storage-cleanup trick.
Build a “Review Later” System
One reason photo organization fails is that people try to make permanent decisions immediately.
Instead, create a temporary holding area.
It could be an album called:
Review Later
or
Sort Later
When you encounter a photo you are unsure about, put it there and move on.
Then revisit that collection after the main cleanup.
This separates two tasks:
Organizing
and
Making difficult decisions
That makes the process much faster.
After a few weeks, you may find that many of the uncertain photos are obviously unnecessary.
Organize Large Events in Batches
Suppose you have 700 photos from a family vacation.
Do not inspect them randomly.
Search or browse around the approximate date.
Select the obvious photos from that event and place them into one album.
Then remove clear mistakes and duplicates.
Finally, choose the best photographs as favorites if appropriate.
You do not need to make the album perfect.
A 700-photo trip album can still be useful if you can quickly find the important pictures.
If you later want a smaller collection, create a separate album such as:
Japan Trip — Best Photos
This is often better than trying to reduce the original event album immediately.
Use Search Instead of Creating More Albums
Modern photo apps increasingly provide search and automatic organization features.
On iPhone, Photos can search within albums using people, objects, or places, and albums can also be filtered and sorted.
Google Photos similarly provides search and organization features alongside albums and photo stacks.
This means you do not have to create an album every time you think:
“I might need these photos later.”
Before creating a new album, try searching for the information you already know.
If you can reliably find the photos using search, the album may not be necessary.
Don’t Mix Cleanup With Major Cloud Changes
Be careful if you are simultaneously:
- Changing cloud providers
- Moving photos between accounts
- Turning synchronization off
- Downloading your entire library
- Deleting local copies
- Deleting cloud copies
- Changing your phone’s backup settings
These operations can interact in ways that are difficult to undo.
A safer approach is to stabilize the library first.
Then organize it.
Then make storage or migration changes separately.
This gives you a clearer recovery point if something goes wrong.
If You Have Both iPhone and Android Photos
A mixed library can become confusing because different systems use different approaches to albums, folders, cloud storage, and synchronization.
Do not immediately create duplicate albums in every service.
First decide which service is your primary photo library.
For example, you might decide that your main library is:
Apple Photos/iCloud Photos
or
Google Photos
or a carefully maintained local computer library.
The important thing is to know where the master collection lives.
If the same photos are being copied into several systems without a clear purpose, organization becomes harder because you can no longer tell which copy is authoritative.
What to Do With Existing Messy Albums
You do not necessarily need to rebuild your albums from zero.
Start by looking at existing albums and classify them mentally:
Useful
Duplicate
Outdated
Too specific
Empty
If an album is useful, keep it.
If several albums contain overlapping photos, consider consolidating them.
If an album is no longer useful, delete the album rather than automatically deleting its photos.
On iPhone, deleting an album does not delete the photos and videos from the main library.
That makes album cleanup much less risky than deleting photos themselves.
Still, always check what a particular gallery app does before performing a large deletion, because not every photo system handles albums in exactly the same way.
A Practical Workflow for Thousands of Photos
If your library is seriously messy, use this order.
Step 1: Verify the backup
Confirm that important photos exist in your intended backup or cloud library.
Open the backup from another device or the web when possible.
Do not assume that seeing a backup icon means every important photo is safely accessible.
Step 2: Stop new clutter
Before cleaning thousands of old photos, reduce the flow of new junk.
Avoid automatically saving every downloaded image, screenshot, meme, and temporary picture into your main library when your device offers ways to control that behavior.
Step 3: Remove obvious junk
Start with screenshots, accidental photos, unwanted downloads, and other items you know you do not need.
Step 4: Handle duplicates
Use built-in duplicate detection where available and manually review similar images.
Step 5: Create only your core albums
Start with perhaps five to ten useful albums rather than fifty.
Step 6: Organize important events
Work through major trips, family events, projects, and other groups that you are likely to revisit.
Step 7: Use Favorites selectively
Choose the photos you want to find quickly.
Step 8: Create a temporary review group
Move uncertain photos there rather than stopping the entire cleanup.
Step 9: Leave ordinary photos in the main library
Do not feel obligated to give every photo a permanent album.
Step 10: Maintain the system
Once the library is manageable, spend a few minutes periodically removing new clutter.
The goal is to prevent another 5,000-photo cleanup project.
A Simple Rule for Future Photos
After the initial cleanup, use this decision:
Important memory? Keep it.
Useful document or reference? Keep or archive it appropriately.
Temporary image? Delete it when finished.
Multiple nearly identical shots? Keep the best few.
Uncertain? Put it into Review Later.
Something you expect to revisit as a group? Add it to an album.
Everything else? Leave it in the main library.
This is much easier to maintain than a complicated folder system.
Common Mistakes That Make Photo Organization Worse
Creating too many albums
More albums do not automatically mean better organization.
If you need to remember 100 album names, finding something may become harder.
Sorting every photo manually
This consumes enormous amounts of time and encourages you to abandon the project.
Use search, dates, automatic grouping, and other available tools first.
Deleting before confirming backups
This is the most dangerous shortcut.
Organize first. Delete carefully.
Treating archive as backup
An archived photo is still part of the library and may still consume storage.
Keeping every version of a photo
Burst shots and repeated attempts can quietly turn a small event into hundreds of nearly identical images.
Deleting photos simply because they are old
Age does not determine value.
A 10-year-old family picture may be more important than yesterday’s screenshot.
Trying to make the library perfect
A photo library is a working collection, not a museum archive.
It only needs to be easy enough to search, browse, protect, and maintain.
A 30-Minute Photo Cleanup You Can Repeat
If thousands of photos feel overwhelming, do not promise yourself that you will organize everything this weekend.
Set aside 30 minutes.
During the first session, remove obvious screenshots and accidental photos.
Next time, handle duplicates.
Another session can focus on one large event.
After several sessions, the library can look dramatically better without requiring an exhausting marathon.
You can also stop after each session once the difficult decisions begin to outweigh the benefit.
Consistency is more useful than one huge cleanup followed by another two years of chaos.
The Organization System That Usually Lasts
A good photo organization system should survive busy months.
That means it should require very little effort.
Keep the main library as the master collection.
Use a small number of meaningful albums.
Use Favorites for genuinely important photos.
Use search instead of creating an album for every possible category.
Keep temporary images from accumulating.
Review screenshots and downloads regularly.
And keep your backup separate from your organizational system.
That last point matters more than the folder structure.
A perfectly organized library that exists in only one place is still vulnerable to device failure, accidental deletion, account problems, or other unexpected events.
Final Takeaway
You do not need to manually sort thousands of phone photos into hundreds of folders.
Start by protecting the library. Then remove obvious clutter, deal with duplicates separately, create a small number of albums around things you actually want to find later, and let the phone’s search and organization features handle as much of the work as possible.
Most ordinary photos do not need an album.
An album should exist because it makes a particular group easier to find, share, or revisit.
Once the library is under control, the best maintenance system is surprisingly simple: delete temporary pictures, keep only the better versions of repeated shots, add important events to useful albums, and avoid creating organizational work that you will not want to repeat.
The goal is not to build a perfect photo library.
The goal is to make your photos easy to find without turning photo management into another full-time job.
Frequently Asked Questions
Should I organize my photos by year and month?
Usually, you do not need to create separate albums for every year and month. Most modern photo apps already organize the library chronologically. Use albums for events, projects, people, or groups you expect to revisit.
How many photo albums should I have?
There is no ideal number. Start with a small set that matches how you actually use your photos. If you keep creating increasingly specific albums just because you cannot find a place for one picture, your system may be too complicated.
Should I delete photos from my phone after putting them in an album?
Not automatically. An album is often a grouping mechanism rather than a separate backup location. Verify how your particular photo service works before deleting anything.
What should I do with thousands of screenshots?
Treat screenshots as a separate cleanup category. Delete temporary screenshots first, keep important references, and move documents or information you need to retain into a more appropriate system when practical.
Is it better to keep one large album or many small albums?
Usually, meaningful medium-sized albums are easier to maintain than hundreds of tiny ones. Create an album when it helps you retrieve or share a specific group of photos.
What if I am afraid of deleting an important photo?
Do not delete it during the first pass. Put it into a Review Later group. Before permanently deleting important photos, confirm that the backup copy is accessible and that you understand how deletion affects your synced devices.
Sources and Further Reading
- Apple Support — photo albums and folders on iPhone.
- Apple Support — adding, removing, searching, filtering, and sorting photos in albums.
- Apple Support — duplicate photo detection and merging.
- Apple Support — organizing albums through iCloud Photos.
- Google Photos Help — creating and editing albums.
- Google Photos Help — photo stacks and organizing the Photos view.
- Google Photos Help — archiving photos.
- Google Photos Help — organizing documents into categories such as receipts and IDs.