Duplicate photos are one of those problems that seem easy to fix until you realize that two files that look identical may not actually serve the same purpose.
You might have the same picture in your Camera folder, Downloads folder, WhatsApp folder, cloud storage, and a computer backup. You might also have an edited version that looks almost identical to the original. Delete the wrong copy, and you could lose the higher-quality file, its original metadata, or the only copy that is stored safely outside your phone.
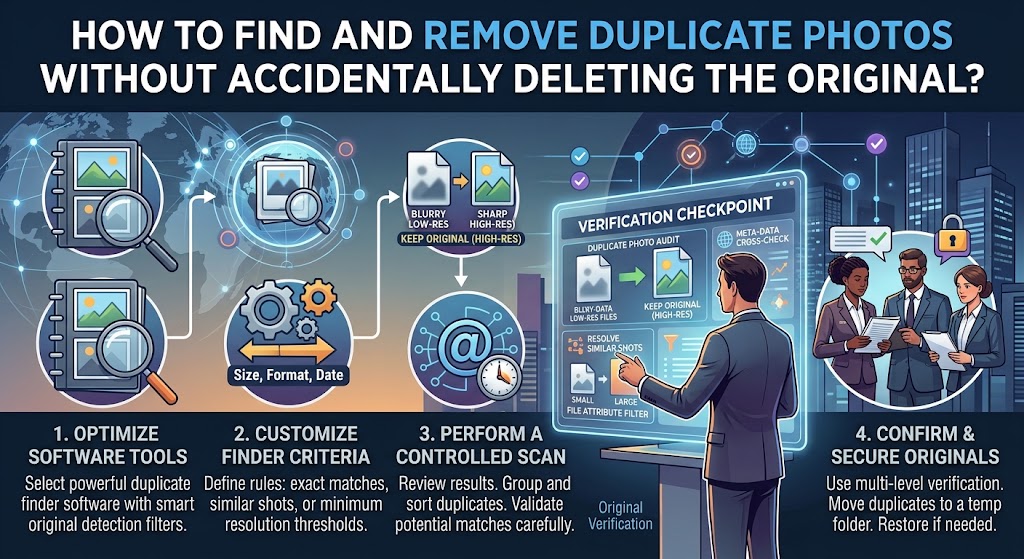
The safest approach is not to start deleting photos as soon as you find similar images. First determine which files are truly duplicates, which copy you want to keep, and whether another backup exists.
Apple Photos has built-in duplicate detection on supported iPhone, iPad, and Mac versions. Google Photos, however, does not currently provide the same general-purpose duplicate-removal feature, so Google users may need a more manual approach.
Here is a safer way to clean up your photo library.
What Counts as a Duplicate Photo?
A duplicate is more than two pictures that look similar.
There are several different situations you may encounter.
The first is an exact duplicate. This is essentially the same image file saved more than once.
The second is a converted duplicate. For example, you might have the same photograph saved as both JPEG and another image format.
The third is a resized copy. It may show the same picture but have lower resolution than the original.
The fourth is an edited copy. The image may look almost identical, but one version could contain edits, cropping, filters, or other changes.
There are also photos that are similar but should not be considered duplicates at all. Two pictures taken seconds apart may show nearly the same scene, yet one could contain a better expression, sharper focus, or an important detail.
That is why automatic cleanup tools should be treated as assistants rather than final decision-makers.
Before Deleting Anything, Make One Safety Copy
The first step is surprisingly simple: don’t begin the cleanup with permanent deletion.
If the photos matter to you, make sure you have at least one reliable backup before doing a large cleanup.
For example, you might have the original library on your computer and a cloud backup. You could also export particularly important family photographs to an external drive.
The important point is that the backup should be independent enough to protect you if the cleanup goes wrong.
A synced cloud library is not always the same thing as a separate backup. If you delete a photo from a synchronized library, that deletion may also be reflected on your other devices.
Before removing hundreds of photos, test your backup by opening several important pictures from the backup location. Do not simply assume that because an app says something is synchronized, every important file is safely recoverable.
Start by Identifying Where Your Photos Are Stored
A common mistake is assuming there is only one photo library.
Your pictures might be stored in several places:
- Your phone’s main camera folder
- Downloads
- Screenshots
- Messaging-app folders
- Social-media downloads
- Cloud photo services
- An external SD card
- A Windows or Mac photo library
- An external hard drive
- An old phone backup
This matters because two files can look like duplicates while actually being copies in completely different storage locations.
For example, suppose a photo exists in your phone’s Camera folder and also in a folder created when you imported photos to your computer. Deleting one may be harmless if the other is a verified backup. But deleting both could remove your only remaining copies.
So before cleaning up, decide which location is your primary photo library and which locations are backups or secondary copies.
That distinction makes the rest of the process much safer.
How to Recognize a Safer Duplicate
When two photos look identical, compare more than the thumbnail.
Check the following:
File name
Different names do not automatically mean different photographs.
A file named IMG_2451.jpg and another named IMG_2451_copy.jpg could contain the same image.
Likewise, identical names do not guarantee that two files are the same.
Resolution
Look at the image dimensions.
A 4032 × 3024 image contains considerably more detail than a 1280 × 960 copy of the same photograph.
If you need to keep only one, the higher-resolution version is normally the better candidate, provided it is otherwise intact.
File size
File size can provide another clue.
If one copy is several megabytes and another is only a few hundred kilobytes, they may not be identical files even if they look the same on your phone.
Do not use file size alone to decide which one to delete, though. Compression and image formats can produce very different file sizes.
Date and time
Check when the files were created or captured.
This can help you understand where a copy came from.
However, dates can change when files are copied between devices, so treat timestamps as evidence rather than absolute proof.
Location
A photo stored in your main camera folder may be your original capture, while the same image in Downloads may have been downloaded later.
Again, this is a clue rather than proof.
Metadata
Important photographs may contain metadata such as capture date, camera information, location, or editing information.
If two files contain different metadata, do not automatically assume that one is useless.
Use Apple’s Built-In Duplicate Detection on iPhone
If you’re using an iPhone with a supported version of iOS, Apple’s Photos app can identify duplicate photos and videos.
Starting with iOS 16, the Photos app can place detected duplicates in a Duplicates collection under Utilities. The detection process may take some time because the phone has to index the library. Apple says the process may require the iPhone to be locked and connected to power, and larger libraries can take longer to analyze.
To check for duplicates:
Photos → Collections → Utilities → Duplicates
If duplicates have been identified, you can review the groups and choose Merge.
The important word here is review.
Don’t blindly merge every group just because the application identified it.
Look carefully at the images first.
Apple’s merge process combines the highest image quality and relevant data into the remaining photo, while the other duplicate items are moved to Recently Deleted.
That provides an important safety net.
If something does not look right after the merge, you can check Recently Deleted before the items are permanently removed.
Why You Should Still Review Apple’s Suggestions
Automatic duplicate detection is useful, but your personal definition of “keep” may be different from the software’s.
Imagine that you have two versions of a family photograph.
One is slightly lower quality but contains the original date information you care about. Another is higher quality but was edited later.
The system may determine that they are duplicates or closely related, but you may prefer to preserve both.
Before merging, ask yourself:
Are these truly interchangeable?
If the answer is no, don’t merge them simply to reduce the number of files.
Storage savings are not worth losing information you may later need.
Removing Duplicates on a Mac
Apple also provides duplicate detection in the Photos app on Mac.
If Photos has identified duplicates, they appear in the Duplicates collection under Utilities. You can select individual groups or multiple groups and choose Merge.
Apple says that after merging, one photo or video remains and the deleted duplicates move to Recently Deleted. Those deleted items can be recovered within the available recovery period.
This is safer than manually selecting random files from Finder because Photos understands the structure of its own library.
Still, the same rule applies: inspect important photographs before merging them.
What About Google Photos?
This is where many people get confused.
Google Photos is excellent for storing and organizing photographs, but it does not currently provide the same built-in Duplicates collection found in Apple Photos.
Recent Google Photos community guidance indicates that there is no general built-in tool in Google Photos for automatically finding and removing duplicate photographs. Users may therefore need to identify duplicates manually or use other device-level cleanup tools where appropriate.
That means you should be particularly careful if your entire photo library is inside Google Photos.
Do not download a random “duplicate remover” simply because it promises to delete thousands of images with one tap.
Third-party tools can have access to your personal photographs, and an aggressive cleanup process can make it difficult to determine what was actually removed.
For important photos, a slower manual process is often the safer choice.
A Safer Manual Method for Google Photos
If you are using Google Photos and suspect you have duplicates, start with periods when duplicates are most likely.
For example, think about when you:
- Changed phones
- Restored a backup
- Imported photos from a computer
- Moved photographs between folders
- Downloaded your cloud library
- Switched backup services
- Re-uploaded an old photo collection
These events often explain why the same photographs appear more than once.
Instead of checking thousands of images randomly, work through one date range or event at a time.
Suppose you imported vacation photographs in July and later restored an old backup containing the same pictures.
Start with July.
When you find two copies, compare the image quality, resolution, metadata, and location before deciding which one to remove.
This is slower than pressing a “clean everything” button, but it gives you much more control.
Be Careful With Google Photos and Synchronized Devices
One of the biggest risks is forgetting that a cloud photo service may be connected to several devices.
Before deleting a photo, determine whether you are deleting:
one local copy
or
the photo from your synchronized library.
Those are very different actions.
If you simply want to free space on a phone, you should not automatically delete photographs from the cloud library.
Likewise, if your goal is to remove an unnecessary cloud duplicate, make sure you understand which copy you’re selecting before confirming the deletion.
This is especially important when several phones, tablets, and computers use the same account.
Finding Duplicates on Windows
Windows users may have photographs spread across multiple folders rather than one centralized library.
The Microsoft Photos app can search photos by information such as file name, date, and file type. On supported Windows 11 systems, it can also provide other search methods depending on the device and configuration.
For duplicate cleanup, folder structure becomes important.
You might discover something like this:
Pictures\Camera
and
Pictures\Old Phone Backup
Both folders could contain the same photographs.
Instead of immediately deleting the second folder, open several sample photographs and compare them.
If you determine that the old folder is genuinely redundant, move it somewhere temporary rather than immediately deleting everything.
Microsoft’s Photos Legacy documentation also notes that deleting media sends files to the Windows Recycle Bin, while OneDrive-related deletions can involve its recycle bin as well.
That gives you a recovery opportunity, but it should not replace a proper backup.
The Temporary Holding Folder Trick
This is one of the safest techniques for manual duplicate cleanup.
Instead of deleting a suspected duplicate immediately, create a temporary folder called something like:
Photos Cleanup — Review
Move suspected duplicates there.
Do not permanently delete them yet.
Then use your normal photo library for several days.
If you suddenly realize that an application, workflow, or backup depends on those files, you still have them.
After you are satisfied that the main library is intact and your backup works, you can permanently remove the temporary copies.
This simple extra step turns a risky cleanup operation into a reversible one.
Never Assume the Newest File Is the Original
File dates can be misleading.
Imagine you copied an original photograph from an old phone to your computer yesterday.
The computer may show yesterday’s file date even though the photograph was taken five years ago.
That does not mean yesterday’s copy is the newer photograph.
Similarly, a downloaded cloud copy may have a different filesystem timestamp from the original camera file.
When deciding which copy to keep, look at the actual photo information rather than relying on the file’s current timestamp alone.
Watch for Edited Photos
Edited photographs are another major source of accidental deletion.
You might have:
- The original photograph
- A cropped version
- A brightened version
- A filtered version
- A resized version
- A version prepared for social media
They may look nearly identical when displayed as thumbnails.
But they are not necessarily duplicates.
If you only want to keep one version, decide which version you actually need before deleting anything.
If the original matters for future editing, preserve it even if the edited version looks better today.
Screenshots Are Often Worth Handling Separately
Screenshots can make a photo library look much more cluttered.
Receipts, conversations, maps, instructions, temporary reference images, and social-media screenshots can accumulate quickly.
Rather than mixing screenshot cleanup with your family and personal photographs, consider handling the screenshot folder separately.
This reduces the chance of accidentally deleting an important camera photograph while trying to clean up temporary images.
It also makes your decisions easier.
You can usually judge a screenshot based on whether you still need the information, while duplicate personal photographs require a different standard.
Don’t Confuse Similar Photos With Duplicates
This is perhaps the most important rule in the entire cleanup process.
Two photographs can be almost identical and still both be worth keeping.
For example, imagine taking five pictures of a birthday celebration.
The first four may look similar.
But one might have everyone looking at the camera, another may have someone’s eyes open, and another may capture a better moment.
A duplicate cleaner may see visual similarity.
You see the context.
When reviewing photographs, ask:
If I deleted one of these, would I genuinely miss anything?
If there is uncertainty, keep both until you have a better reason to remove one.
Storage is usually easier to replace than a meaningful photograph.
A Simple Three-Question Test Before Every Deletion
Before deleting a suspected duplicate, ask three questions.
Question 1: Are these actually the same photograph?
Compare the image itself, not just the thumbnail.
Question 2: Which copy has the information I want to preserve?
Check quality, resolution, metadata, edits, and original status.
Question 3: Do I have another verified copy?
Know where the backup is and make sure you can actually open it.
If you cannot confidently answer all three questions, don’t delete the file yet.
What to Do If You Accidentally Delete the Wrong Photo
Don’t panic and immediately continue cleaning.
First stop the cleanup process.
Then check the appropriate recovery location.
On Apple devices, merged duplicate items are moved to Recently Deleted, where they can be recovered during the available recovery period.
On Windows, deleted media can be sent to the Recycle Bin depending on where the files were stored.
If the photo is missing from the normal recovery location, check your cloud library, computer backups, external drives, and other devices before assuming it is permanently lost.
Most importantly, don’t create new files in a location where you are attempting professional-level data recovery unless you understand the consequences. If the photograph is irreplaceable, stop and consider getting appropriate data-recovery help rather than repeatedly experimenting.
A Better Way to Clean a Large Photo Library
If you have tens of thousands of photographs, trying to clean everything in one afternoon is a recipe for mistakes.
Work in small batches.
Start with one month, one folder, or one event.
Identify obvious duplicates.
Move questionable files into a temporary holding folder.
Verify the remaining library.
Check your backup.
Then continue.
You will make better decisions when you are looking at 50 questionable photos rather than 5,000.
It also makes it much easier to notice a mistake.
The Safest Duplicate-Photo Workflow
A reliable workflow looks like this:
Back up first.
Make sure important photographs exist somewhere safe.
Identify your main library.
Know which location you consider the master collection.
Find likely duplicates.
Use built-in tools where your platform provides them, such as Apple’s Duplicates collection.
Review before deleting.
Never assume that visual similarity means the files are interchangeable.
Compare quality and information.
Check resolution, metadata, edits, file size, and location.
Move uncertain files instead of deleting them.
Use a temporary holding folder.
Check your backup.
Open several important photographs from the backup.
Wait before permanent deletion.
Give yourself time to notice anything missing.
Then remove the confirmed duplicates.
This approach takes longer than a one-click cleanup, but it dramatically reduces the chance of losing something important.
Final Thoughts
Duplicate-photo cleanup is not really about finding the largest number of files you can delete.
It is about deciding which copies are genuinely unnecessary while protecting the photographs that matter.
Apple users have a useful built-in Duplicates feature that can merge detected duplicate photos and move the removed copies to Recently Deleted.
Google Photos users need to be more cautious because Google Photos does not currently offer the same general duplicate-removal workflow. Manual review may be necessary.
Whatever device you use, the safest rule is simple: verify first, delete second.
If a photograph is irreplaceable, keeping one extra copy is usually a much smaller problem than discovering that the only good copy disappeared during a cleanup.
Frequently Asked Questions
Is it safe to delete duplicate photos?
It can be safe when you have confirmed that the files are genuinely duplicates and that the copy you are keeping is intact. Do not rely only on similar thumbnails. Check quality, resolution, metadata, and backup status first.
Does iPhone automatically find duplicate photos?
Supported iPhones can identify duplicates in the Photos app and place them in the Duplicates collection under Utilities. The phone may need time to index the library before the collection appears.
Does Google Photos have a duplicate-photo finder?
Google Photos does not currently provide the same built-in Duplicates collection available in Apple’s Photos app. Recent Google Photos community guidance recommends manual identification rather than assuming an automatic duplicate-removal feature exists.
Should I delete the lower-quality copy?
Usually, if you have confirmed that both files are the same photograph and the higher-quality copy is safely stored, the lower-quality copy is the more obvious candidate for removal. But check metadata and whether one version contains an edit or other information you want to preserve.
What if two photos look almost identical but are not exact copies?
Keep both until you determine whether they contain meaningful differences. Similar photographs are not necessarily duplicates. This is especially important for family events, travel photos, documents, and pictures taken in bursts.
How can I avoid losing photos while cleaning them up?
Make a verified backup first, work in small batches, review suspected duplicates manually, move uncertain files to a temporary folder instead of deleting them, and wait before permanently removing anything. This gives you several opportunities to catch a mistake before it becomes permanent.
Sources and Further Reading
For platform-specific guidance, refer to the official documentation from Apple and Microsoft. Apple’s current guidance explains duplicate detection and merging on iPhone and Mac, while Microsoft’s documentation explains photo searching and how deletion behaves in its Photos environment.